Beginner's Guide to Building a Terrarium in a Wine Bottle
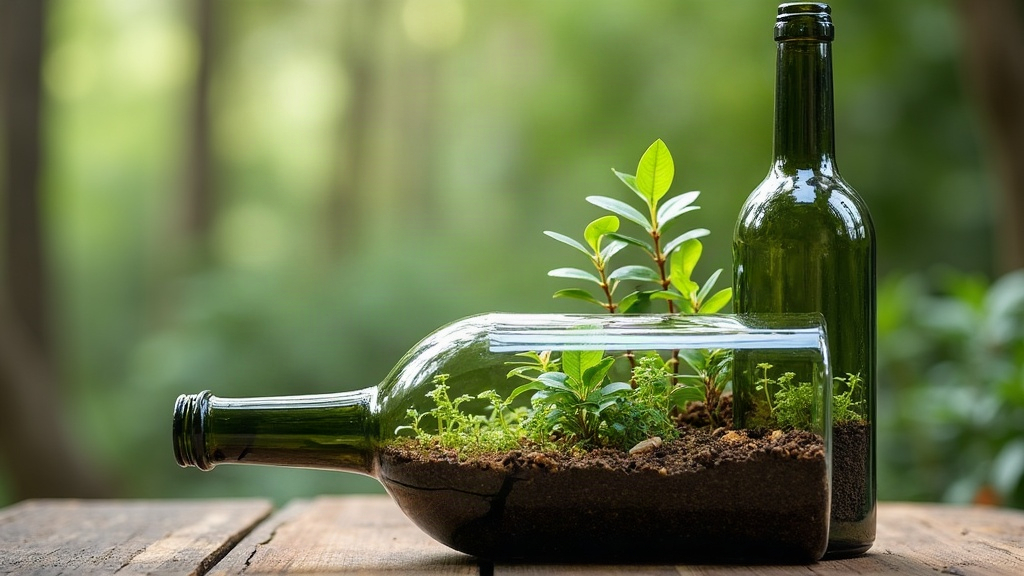
Building a terrarium inside an old wine bottle is one of those beginner projects that actually delivers: you take something that would’ve gone in the recycling bin, and turn it into a tiny living landscape sitting on your kitchen counter. It costs next to nothing, you don’t need a green thumb, and honestly, the hardest part is just being patient while you work through that narrow neck. This guide covers the whole process, from picking the right bottle to keeping your little glass ecosystem alive for years instead of weeks.
Why a Wine Bottle Makes a Great Terrarium
The narrow neck isn’t a design flaw here, it’s actually the whole point. It traps humidity naturally, so you’re not constantly fussing over watering schedules. There’s also a nice side effect: the curved glass bends light slightly, so you get this magnified view of roots and water droplets forming on the inside walls. Compare that to a plain mason jar, which always looks a bit like, well, a jar someone stuck plants in. A wine bottle has a shape to it. It reads as intentional, like something you’d actually choose to put on a shelf rather than something you threw together on a Sunday afternoon.
Best bottle types:
- Clear glass bottles (skip the green or brown ones) let in the most light.
- Wide-bottomed bottles (think Burgundy or Chianti shapes) give you more room to actually plant something.
- Large-format bottles, like 1.5L magnums, are friendlier for first-timers because the opening is just a bit more forgiving.
Tools and Materials You’ll Need
- Empty wine bottle, label soaked off and interior rinsed clean
- Glass bottle cutter, or a trip to a local glass shop if you want the top sliced off for easier access
- Small funnel or a rolled-up paper cone
- Long tweezers or a pair of chopsticks
- A small spoon taped to a skewer (improvised, but it works for digging)
- Activated charcoal, the aquarium-grade kind
- Pebbles or small gravel for drainage
- Sphagnum moss
- Potting soil, something lightweight and well-draining
- Small plants suited to life in a closed environment (more on this below)
- Spray bottle filled with water
Step-by-Step: Building the Terrarium
1. Decide: Open Neck or Cut Bottle
You’ve got two routes here. One is working through the original narrow neck using long tools on a stick, no cutting involved, just a lot of patience and slow, careful movements. The other is cutting off the top third of the bottle with a glass cutter kit, which opens things up and makes planting genuinely easy instead of fiddly. If this is your first attempt, just cut the bottle. Trust me, your future self will thank you when you’re not spending twenty minutes trying to drop a single fern into a two-inch opening.
2. Build the Drainage Base
Pour in a layer of pebbles or gravel, about 1 to 2 inches deep. This gives excess water a place to collect that isn’t directly in your soil, which is what keeps roots from rotting.
3. Add the Charcoal Layer
Sprinkle roughly half an inch of activated charcoal right on top of the gravel. It filters the water as it moves through and keeps that closed-off environment from turning moldy or starting to smell musty.
4. Layer Sphagnum Moss
A thin layer of moss goes next, right over the charcoal. Think of it as a barrier: it keeps soil particles from drifting down into your drainage layer while still letting water pass freely.
5. Add Soil
Add 2 to 3 inches of potting soil. Mound it up a little higher toward the back of the bottle, it gives the whole arrangement more visual depth once you start planting.
6. Plant Your Terrarium
Grab your tweezers or a chopstick and start placing plants, tallest ones toward the back, shorter ones up front. Take your time with this part; it’s genuinely the most satisfying step.
Best plants for a wine bottle terrarium:
- Moss (nearly impossible to mess up)
- Baby’s tears (Soleirolia soleirolii)
- Nerve plant (Fittonia)
- Miniature ferns, like button fern or maidenhair
- Small ivy cuttings
- Air plants, if you’d rather skip soil altogether for a lower-mess setup
Skip succulents and cacti entirely. They hate humidity, and a closed bottle is basically a sauna for plants, they’ll rot within weeks.
7. Water Lightly
Mist with your spray bottle until the soil feels damp, not soggy. Overwatering is, hands down, the number one mistake beginners make with these.
Caring for Your Bottle Terrarium
- Light: Bright but indirect. Direct sun turns the glass into an oven and cooks everything inside it.
- Watering: Check in once a week. If the inside walls are constantly fogged up with condensation, that’s your sign it’s too wet, just leave it open for a day or two to let it breathe.
- Pruning: Small scissors, trim as needed to keep things from getting leggy or lopsided.
- Closed vs. open: Cut the top off? You can leave it uncovered, but it’ll need slightly more frequent misting than a fully sealed bottle.
Common Beginner Mistakes to Avoid
- Skipping the drainage layer (hello, root rot)
- Reaching for garden soil instead of a light, sterile potting mix
- Cramming in too many plants at once
- Setting it on a windowsill that gets direct afternoon sun
Final Thoughts
A wine bottle terrarium proves you don’t need a big budget or fancy gear to pull off a good DIY project, just a bit of patience and a willingness to get your hands dirty (literally). Start simple with moss and ferns, keep half an eye on moisture levels, and within a few weeks you’ll have a tiny self-sustaining garden that people will genuinely ask about when they visit.